
So here is what I put together - I hope that it entertains her! I feel like I prepared for a 12 hour trip and we are only driving 5 hours at a time. I'm a teacher turned stay at home mom so I know that being over prepared is way better than not having enough to do!!!
I used a canvas bin to store all of the materials in. I figured this would fit perfectly in between the car seats and Alexandra should be able to reach in and get what she wants.

The Binder:
I used a 1.5 inch binder with plastic inserts so that I could make a cover and use the back insert to hold a clipboard (see later picture!) Originally I wanted to have the storage cases in the binder too but it got to be too bulky.

Map:
I printed out a map of the United States on cardstock and I put dots in the states that we will be traveling through. Then I also printed out the individual states on cardstock and attached them to the sheet protector with velcro. I was going to hold the states up front in the car by placing them on the visor (the velcro should attach) and then I am going to hand Alex a state when we enter that state. She can see our progress on our trip.

Bingo!
I got this particular free template from Homemaking Expert but there are lots of different boards out there!

Letter Scavenger Hunt:
I made this homemade board in Microsoft word by making a table and just making it pretty! Alex can cross off letters as she sees them on signs.

State License Plate Game:
Now I'm not sure if Alex will even do this activity -because it's probably better for older kids, but I thought I'd include it anyways so she can see the different license plates. Maybe she will be able to see them close up. I got this printable from The Dating Divas. There are other printables too so check it out!

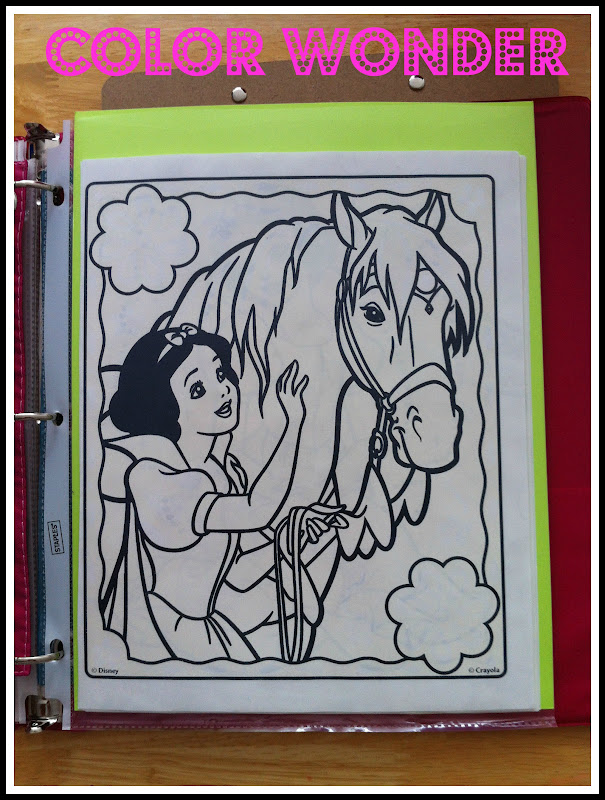
Coloring Pages:
Alexandra is really into coloring these days AND into coloring in the lines so this should keep her busy! I included a clip board on the back of the binder so she can pull out a page, and add it to her clipboard. I went through about 5 of her coloring books and picked out various pages. I included the crayons and colored pencils in the pink pouch. Then I also included some color wonder pages and markers. The best thing about these is NO MESS!

Stickers and Stencils:
I have some plain white computer paper, stickers, and stencils for Alex to use

Activity Pages:
Alex loves doing workbook pages like dot to dots, mazes, etc. So I included some pages from her workbooks and also some hidden picture pages. All of the pages so far have been stored in clear plastic sheets. Again, she can pull one out and attach it to the clipboard.

Velcro Sticks:
Alexandra loves building and making "creations" as she calls them, and so I saw this idea over at Tot Treasures and thought she would love to use them too. Super easy to make too - just stick some velcro on the end of the sticks and start sticking together. I used a medium sized stick but you can use any size. They fit perfectly in one of the 3 hole pouches (that got at Big Lots for $1.00 each!)

Personalized Magnetic Doll:
This is probably my favorite thing I made for Alexandra's binder. She has some Melissa and Doug magnetic dolls but they are super bulky so what I did was I took a picture of her, enlarged it and printed it out and taped it to cardstock using double sided tape. Then I cut it out and put a magnet on the back. The scale is a little off and her head is a tad bit big for the clothes but it's still fun nonetheless!
I used a tray that goes to our toaster oven for the magnetic sheet. I cleaned it off and then taped some colorful paper to it that I had leftover from her birthday party. She can use this magnetic board for the dolls, her Melissa and Doug magnetic animals, and Alphabet magnets. I included capital and lowercase letters so she could match them up if she wanted to. And the best part about this part of the binder - it was FREE! I had all of the materials.


Felt Board:
I extended the magnetic board by making a felt board on the back. I did have to go out and buy some felt at a whopping &.34 a piece! I let Alex pick out the colors she wanted and I just used the gray piece she picked out as the background. I attached it to the sheet using magnets (I swear I had a piece of black felt with adhesive in my cart but I guess I didn't!) My original plan was to use use an adhesive piece but the magents work well. Now if she wants she can have a black magnetic surface as well if she removes the felt piece.
I just cut out random geometric shapes and then I also took a few stickers from her Pinkalicious sticker book so she could act out stories with them. She also had these cute mermaid felt pieces that go with a felt board she has at home.

Books:
Alexandra loves to read and look at books so I thought I'd bring along her Tag reading pen with a few books. I would offer to read her regular books while my husband is driving but reading+me+in a car = me feeling nauseous! She can look at her books on her own AND use headphones!!!!

Electronics:
Alexandra loves playing on her Mobigo. She has about six cartridges and each one has about 6 different games on it. So this should keep her busy. Again the headphones can be plugged in so she can just hear the game. I took the Mobigo out of the carrying case that I have for it because it's so bulky and I put the games into one of those pouches. And we also have my iPad, the portable DVD player, and my iPhone should we need it.

Supply Storage:
So you may have seen all of those felt pieces, magnets, etc and thought that they will be lost in the car. Well, my hope is to keep them organized with these pouches that I picked up at Big Lots. Check back at a later date after my vacation to see if my plan worked!!

Things for the Little Man:
My son is just 16 months. So I'm not really sure what all he can do in the car besides sleep and snack. He probably will get enough entertainment from Alex as they go back in forth in the car laughing, singing, or making horrendous noises! But he does love looking at books, especially animal books so I included some of his favorites and a few cars/animals for him to hold.

Snacks!
Anytime I leave the house I usually carry my bigger thermal tote and in it I can put the kids' water, a diaper,wipes, and some snacks. Instead of me handing back snacks all of the time I thought I'd try to pack Alex's lunch bag with prepackaged snacks so she can help herself. I included veggie sticks, puffed corn, raisins, cheerios, goldfish, animal crackers, and a pack of mini blueberry muffins for something sweet. These snacks are meant to last there and back. I sure hope they do!

Covered Clipboard:
I bought this thin clipboard and I covered it with extra colorful paper that I had on hand. I just used double sided tape and it worked well. The clipboard sits right inside the clear plastic cover of the binder and the top part sticks out far enough that Alex doesn't have to remove the clipboard to use it. She can keep it right inside the cover and just clip her papers on top.

I hope that Alexandra enjoys her travel binder. I'm sure she'll enjoy the activities that I made for her. I gave her a preview of it and she wanted to dig right in...but I told her she has to wait until we leave!
As one final thing I got some little things at the Dollar Spot at Target and they are small "prizes" she will get every hour or 2 hours on the trip. I'm wrapping them up in tissue paper so that she can open them and it gives her something to look forward to. Simple things like a bag of M&M's, little stampers, and a few tiny books made great prizes. I didn't tell her about that part yet - I wanted it to be a surprise!
So there it is - our travel binder! I think we are ready! Now I just need to pack!!!!!!!
4 comments:
Great ideas! We are headed on the road this summer. I have four girls...I think I'll have to make a few of these. :)
I would love to know how this worked for you. We did felt last year and it was a mess! Thinking she might do better with something like this.
Andrea - so out of all of the activities the felt was the worst! Little pieces went everywhere so I probably won't do that again. We are actually going on the exact same vacation this year but now the kids will be 3 and 6. I am going to update my book and I'll post about it when I do!! Overall the binder was a success. Kept the kids busy and entertained. This year I'll be making two instead of 1!
Thanks! I'm thinking I may try felt again this year, she has a travel pillow with a felt side that we use. but maybe only cut larger peices that won't get so easily lost . I got too detailed last time and she is a little older (5yr)so that may help as well. And skip the felt for little man(2.5) all together. We will be trying the velcro sticks!
Post a Comment