CLICK HERE FOR FREE BLOGGER TEMPLATES, LINK BUTTONS AND MORE! »
Showing posts with label vacation. Show all posts

Thursday, July 31, 2014

Snack Boxes

Normally when we take a road trip if the kids want a snack I'm passing them from the cooler to the back seats. This year I decided to try something different. I made each of the kids their own snack box.  I made Camden a blue one and Alex a pink one, each labeled with their names. The boxes are easy to open and snap shut so the goal is to be able to have them pick their own snacks in the box that they want to eat. They each got the same snacks so there won't be any complaining that one sibling got something that the other one didn't. I tried to include some "healthier" options - apple slices, string cheese, applesauce pouch, and pretzels, but also included a few "treats" like graham crackers and fruit snacks.

The first part of our trip will be almost 7 hours. So when we reach the halfway point I am going to give the kids each a little treat cup with candy corn, gummy worms, swedish fish, a tootsie roll, and a few marshmallows - that cup will be a total surprise so hopefully they like it!


Sunday, July 27, 2014

Travel Binders: 2 years later

Just about 2 years ago I made my first travel binders for our drive to Bald Head Island vacation. Back then my daughter just turned 4 and my son was only 17 months old. You can see those binders here.

Flash forward 2 years and now my daughter just turned 6 and my son is almost 3.5 years old. Before Camden didn't really even get a binder but instead some cars, magnets, and Fisher Price Little People to play with. This time around he's been watching me create his binder and can't wait to play in his "travel workbook" as he calls it.

We will be driving 6 hours the first day and then will stay over night and finish the final two hours the next day. I'm not really worried about entertaining the kiddos during those last two hours - we often drive that far for visits with family. It's those 6 hours that I want to be prepared for.

I used some of the ideas from the previous binder and came up with some new ideas on my own (and didn't totally rely on Pinterest) It's true...I can actually still can come up with some original ideas!

So here it goes - our updated binders!


Cover
I used a 1" colorful binder with pockets in the inside and clear plastic on the outside - this way I could put on a title page and even a page on the back.

Removable Magnetic Pieces
On the inside cover I used magnetic tape (found in a roll at Walmart) and put 4 strips on the binder. These strips will hold mermaid pictures (which were mermaid/sea stickers that I stuck on paper, cut out, and then added magnetic tape to the back) and state cutouts. We start in Pennsylvania and will travel through MD, VA, and NC. As we enter a new state Alexandra can remove the state cutout and place it on the back of the map, which also has magnetic tape. That way she can see how many states we have left to drive through.

US Map and Sate Coloring Pages
Finally, for each of the states we drive through I have a state information coloring page that I got off of Crayola.com.  Each page has facts such as the state flag, bird, flower, etc.

Activity Pages
I used clear plastic sheets to hold the activity pages. I have mazes, hidden pictures, tic-tac-toe boards, the dot game, and letter tracing pages

Embroidery Floss
I have been trying to teach my daughter how to make friendship bracelets. They seemed to be frustrating for her so instead she just takes two colors and makes "twist" bracelets. Hey, whatever works and keeps her busy. PLUS I won't be losing hundreds of little rainbow loom bands in the car. I will have scissors and masking tape up front in the glove box to help her out and she can tape the floss to the back of her binder and twist away!

Magnetic Puzzle
I put magnetic tape on the back of each piece of a 48 piece Frozen Puzzle. That way she can do the puzzle on her magnetic whiteboard without losing pieces. I also cut out a small picture of what the puzzle looks like . Even after taping all of the pieces I have tons of magnetic tape left. I love that stuff!!!

Bendaroos/Pipe Cleaners
I thought I'd put some Bendaroos and pipe cleaners in the binder so she can make shapes or figures with them. I love those zip pouches too ($1 each at Walmart) because they keep everything contained. (I actually use those pouches to hold puzzle pieces for all of our other puzzles at home too. Super easy organized storage!)

Crayons
I put the crayons in a zipper pouch. I'm going to put the crayons either in the bag in the middle of the kids or on the back of the seat organizer. They just made the binder too bulky to have them inside.

Crayola Dry Erase Markers
I love these dry erase markers! No odor, nice colors, and washable! These are also stored in a zipper pouch outside of the binder.

Color Wonder Markers
These are not pictured but will also go in a zipper pouch - they are en route to my house via Amazon Prime. Love that 2 day shipping! =)

Magnetic Dry Erase Board
I love that we go on vacation so close to back to school time because you can find great supplies for pretty cheap. For $2.50 or so I got a magnetic dry erase board which will serve several purposes. It will be used to play with the mermaid magnets, the puzzle, or just to draw. I also made it removable.I used the 3M strips that are meant for hanging pictures. They attach to one another and can be pulled apart. So, if she wants to take the whiteboard out of the binder she can.


I-Spy Games
I printed out some I-Spy games (that I found on Pinterest) for restaurants, car symbols, and for my son I printed out an easier one.

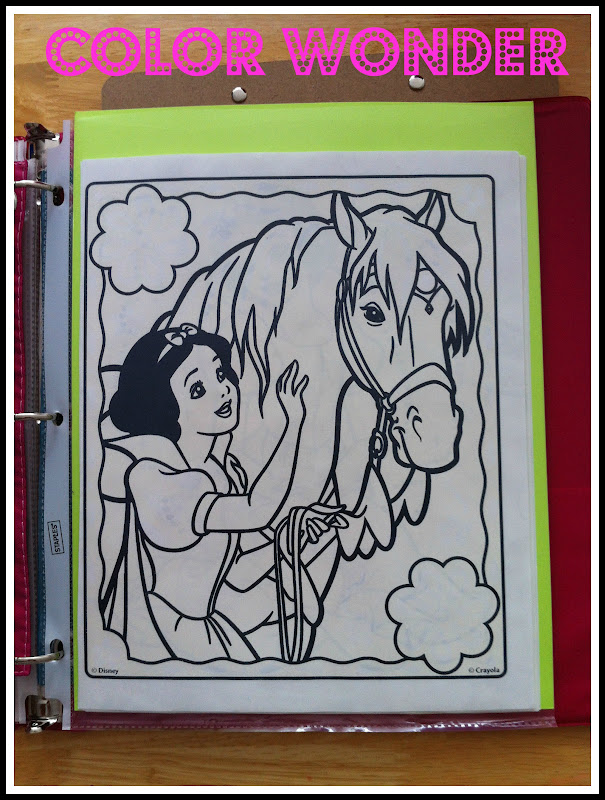
Color Wonder Pages
Last time around when Alexandra was 4 she was into Pooh Bear, Handy Manny, and Dora. This time around she has Disney Princesses and Fairies.


Next Up: Camden's Binder (3.5 years old)

Cover
I added some pictures of construction vehicles, race cars, and a train for Camden's binder. He picked out the orange binder for his "workbook".

Coloring Sheets and Color Wonder
He is not too much into coloring but maybe some pages with his favorite characters will entertain him. I think he'll gravitate towards the Color Wonder (which is probably better anyways since the ink doesn't show on anything but the paper!!!)


Scene Boards
I purchased a "Wonder Pets" reusable sticker and board kit at Ollies for $3.99. The bottom two are a sturdy cardboard. The top two I printed out on photo paper (so that it would be glossy and the reusable stickers will stick to it!!). I got the photo paper at the Dollar Tree. $1 for 8 sheets.


Reusable Stickers/Dry Erase Laminated Pages
We already had all of these Melissa and Doug reusable stickers but I needed a way to stick them in his binder without them all sticking together. I just happened to have a few pages that I already had laminated from when I was a teacher. So, on one side is an activity page that he can use the dry erase markers for , and on the other blank side I put the stickers. Saves space and has multiple uses!

Not only can he use the stickers on those scenes I printed out but also on the windows of the car, on his dry erase board, and on the outside of the binder.


This was one more scene I printed out and I stuck it on the back cover for Camden to use his car stickers. 


Binder Storage
I stored both binders plus the porable DVD player, the iPad, and the Samsung Galaxy Tab in this bag. Each device has different movies, shows, and games on them. I stored the binders first in a deep plastic bin which fits perfectly into my favorite Thirty-One bag. The bag will go in btween the kids and can hold all of this plus water bottles, headphones, snacks, etc. Although, I saw a cute idea about making indvidual snack boxes for kids for a road trip. I'd like to do that but we'll see if I have time. If I do I can post about it later!

Hopefully this will be easy access for the kids and they can help themselves as needed. Like I said I also have an over the seat organizer to store extra things like the crayon and marker pouches, sunglasses, other snacks, tissues, etc.

I'm pretty happy with the way the binders turned out. The kids have been watching me put them together but I told them they are not allowed to use them until we are in the car! I don't want the novelty wearing off before we even leave!



Wednesday, August 1, 2012

A Travel Binder for our Road Trip

This week we are getting ready to go on vacation to Bald Head Island, NC. It's a 9-10 hour trip for us and we are actually splitting it up so we only have to drive 5 hours one day and 5 hours another day. A few years ago we went to Myrtle Beach and Alexandra was just 1. She did great in the car for that trip. Now she is 4 and we also have a 16 month old. He's never been on a trip that's longer than 3 hours. We are timing it just right so that we can get a 1.5-2 hour nap out of him both days and who knows, maybe Alexandra will nap a little too. But then there is the awake time. Alex is good at traveling but after researching about road trips with small children I decided that I wanted to make her a travel binder for the trip. I saw so many ideas on Blogs and on Pinterest and I'm happy I finally found some time to put one together!!

So here is what I put together - I hope that it entertains her! I feel like I prepared for a 12 hour trip and we are only driving 5 hours at a time. I'm a teacher turned stay at home mom so I know that being over prepared is way better than not having enough to do!!!

 The Storage Bin
I used a canvas bin to store all of the materials in. I figured this would fit perfectly in between the car seats and Alexandra should be able to reach in and get what she wants.

The Binder:
I used a 1.5 inch binder with plastic inserts so that I could make a cover and use the back insert to hold a clipboard (see later picture!) Originally I wanted to have the storage cases in the binder too but it got to be too bulky. 


Map:
I printed out a map of the United States on cardstock and I put dots in the states that we will be traveling through. Then I also printed out the individual states on cardstock and attached them to the sheet protector with velcro. I was going to hold the states up front in the car by placing them on the visor (the velcro should attach) and then I am going to hand Alex a state when we enter that state. She can see our progress on our trip. 


Bingo!
I got this particular free template from Homemaking Expert but there are lots of different boards out there! 


Letter Scavenger Hunt:
I made this homemade board in Microsoft word by making a table and just making it pretty! Alex can cross off letters as she sees them on signs. 

State License Plate Game:
Now I'm not sure if Alex will even do this activity -because it's probably better for older kids, but I thought I'd include it anyways so she can see the different license plates. Maybe she will be able to see them close up. I got this printable from The Dating Divas. There are other printables too so check it out! 

Coloring Pages:
Alexandra is really into coloring these days AND into coloring in the lines so this should keep her busy! I included a clip board on the back of the binder so she can pull out a page, and add it to her clipboard. I went through about 5 of her coloring books and picked out various pages. I included the crayons and colored pencils in the pink pouch. Then I also included some color wonder pages and markers. The best thing about these is NO MESS! 

Stickers and Stencils:
I have some plain white computer paper, stickers, and stencils for Alex to use

Activity Pages:
Alex loves doing workbook pages like dot to dots, mazes, etc. So I included some pages from her workbooks and also some hidden picture pages. All of the pages so far have been stored in clear plastic sheets. Again, she can pull one out and attach it to the clipboard. 
Velcro Sticks:
Alexandra loves building and making "creations" as she calls them, and so I saw this idea over at Tot Treasures and thought she would love to use them too. Super easy to make too - just stick some velcro on the end of the sticks and start sticking together. I used a medium sized stick but you can use any size. They fit perfectly in one of the 3 hole pouches (that got at Big Lots for $1.00 each!)


Personalized Magnetic Doll:
This is probably my favorite thing I made for Alexandra's binder. She has some Melissa and Doug magnetic dolls but they are super bulky so what I did was I took a picture of her, enlarged it and printed it out and taped it to cardstock  using double sided tape. Then I cut it out and put a magnet on the back. The scale is a little off and her head is a tad bit big for the clothes but it's still fun nonetheless! 

I used a tray that goes to our toaster oven for the magnetic sheet. I cleaned it off and then taped some colorful paper to it that I had leftover from her birthday party. She can use this magnetic board for the dolls, her Melissa and Doug magnetic animals, and Alphabet magnets. I included capital and lowercase letters so she could match them up if she wanted to. And the best part about this part of the binder - it was FREE! I had all of the materials. 

Felt Board:
I extended the magnetic board by making a felt board on the back. I did have to go out and buy some felt at a whopping &.34 a piece! I let Alex pick out the colors she wanted and I just used the gray piece she picked out as the background. I attached it to the sheet using magnets (I swear I had a piece of black felt with adhesive in my cart but I guess I didn't!) My original plan was to use use an adhesive piece but the magents work well. Now if she wants she can have a black magnetic surface as well if she removes the felt piece. 

I just cut out random geometric shapes and then I also took a few stickers from her Pinkalicious sticker book so she could act out stories with them. She also had these cute mermaid felt pieces that go with a felt board she has at home. 

Books:
Alexandra loves to read and look at books so I thought I'd bring along her Tag reading pen with a few books. I would offer to read her regular books while my husband is driving but reading+me+in a car = me feeling nauseous! She can look at her books on her own AND use headphones!!!! 
Electronics:
Alexandra loves playing on her Mobigo. She has about six cartridges and each one has about 6 different games on it. So this should keep her busy. Again the headphones can be plugged in so she can just hear the game. I took the Mobigo out of the carrying case that I have for it because it's so bulky and I put the games into one of those pouches. And we also have my iPad, the portable DVD player, and my iPhone should we need it. 


Supply Storage:
So you may have seen all of those felt pieces, magnets, etc and thought that they will be lost in the car. Well, my hope is to keep them organized with these pouches that I picked up at Big Lots. Check back at a later date after my vacation to see if my plan worked!! 

Things for the Little Man:
My son is just 16 months. So I'm not really sure what all he can do in the car besides sleep and snack. He probably will get enough entertainment from Alex as they go back in forth in the car laughing, singing, or making horrendous noises! But he does love looking at books, especially animal books so I included some of his favorites and a few cars/animals for him to hold. 
Snacks!
Anytime I leave the house I usually carry my bigger thermal tote and in it I can put the kids' water, a diaper,wipes, and some snacks. Instead of me handing back snacks all of the time I thought I'd try to pack Alex's lunch bag with prepackaged snacks so she can help herself. I included veggie sticks, puffed corn, raisins, cheerios, goldfish, animal crackers, and a pack of mini blueberry muffins for something sweet. These snacks are meant to last there and back. I sure hope they do! 
Covered Clipboard:
I bought this thin clipboard and I covered it with extra colorful paper that I had on hand. I just used double sided tape and it worked well. The clipboard sits right inside the clear plastic cover of the binder and the top part sticks out far enough that Alex doesn't have to remove the clipboard to use it. She can keep it right inside the cover and just clip her papers on top. 

I hope that Alexandra enjoys her travel binder. I'm sure she'll enjoy the activities that I made for her. I gave her a preview of it and she wanted to dig right in...but I told her she has to wait until we leave! 

As one final thing I got some little things at the Dollar Spot at Target and they are small "prizes" she will get every hour or 2 hours on the trip. I'm wrapping them up in tissue paper so that she can open them and it gives her something to look forward to. Simple things like a bag of M&M's, little stampers, and a few tiny books made great prizes. I didn't tell her about that part yet - I wanted it to be a surprise! 

So there it is - our travel binder! I think we are ready! Now I just need to pack!!!!!!!